Best Way to Apply Natural Makeup in 10 Minutes for Busy Mornings
We’ve all been there. The alarm goes off, you hit snooze one too many times, and suddenly you’re rushing around trying to get ready with half the time you actually need. Between shower, breakfast, and outfit changes, makeup often gets squeezed into whatever precious minutes remain. But looking polished and put-together doesn’t have to take an hour in front of the mirror.
This 10-minute natural makeup routine is designed specifically for those hectic mornings when time is not on your side. It’s perfect for work, school, running errands, or any day when you want to look fresh and polished without the time commitment of a full makeup application. The best part? This routine focuses on enhancing your natural features rather than covering them up, giving you that coveted “no-makeup makeup” look that always appears effortless.
Whether you’re a makeup beginner who feels overwhelmed by complex tutorials, or someone who simply doesn’t have the luxury of time in the morning, this streamlined routine will become your go-to solution for looking your best in record time.
Why This Routine Works
Before we dive into the steps, let’s talk about what makes this routine so effective. First, it focuses on multitasking products that serve multiple purposes, cutting down on the number of items you need to apply. Second, it prioritizes the areas that make the biggest impact on your overall appearance, specifically your skin, eyes, and lips. Third, it uses techniques that are quick to execute but still deliver professional-looking results.
The key to a successful quick makeup routine isn’t about rushing through steps or doing sloppy work. It’s about being strategic with your time and knowing exactly which techniques deliver the most noticeable results. When you’re working with limited time, every second counts, and every product needs to earn its place in your routine.
What You’ll Need
Let’s start with the essential products for this routine. You don’t need a vanity full of expensive items, just these key players that work efficiently and effectively.
Your moisturizer with SPF serves double duty by hydrating your skin and protecting it from sun damage. This single product replaces the need for separate moisturizer and sunscreen, saving you both time and steps. Choose a formula that absorbs quickly and doesn’t leave a greasy residue.
Tinted moisturizer or BB cream is your foundation alternative. It provides light coverage, evens out your skin tone, and typically includes beneficial skincare ingredients. Unlike full-coverage foundation, tinted moisturizer can be applied quickly with your fingers and looks naturally skin-like.
Concealer is non-negotiable for this routine. It brightens under-eye circles, covers blemishes, and creates the illusion of well-rested, flawless skin. Choose a shade that’s one or two shades lighter than your skin tone for under eyes, and an exact match for spot concealing.
A brow pencil or powder defines your eyebrows and frames your face. Well-groomed brows make an enormous difference in how polished you look, even when the rest of your makeup is minimal.
Cream blush gives your cheeks a natural, healthy flush. Cream formulas are faster to apply than powder and blend seamlessly into the skin, creating that fresh, just-pinched look.
Mascara is the one eye product you absolutely need. It opens up your eyes, makes you look more awake, and provides definition without any complicated eyeshadow application.
Finally, a tinted lip balm or sheer lipstick adds color to your lips while keeping them moisturized. Choose a shade that enhances your natural lip color rather than dramatically changing it.
The 10-Minute Routine: Step by Step
Now let’s break down exactly how to execute this routine in just ten minutes. I’ll give you realistic time estimates for each step so you can pace yourself effectively.
Step 1: Prep and Prime (1 Minute)
Start with freshly cleansed skin. If you’ve just washed your face, gently pat it dry with a clean towel, leaving it slightly damp. Apply your moisturizer with SPF using upward strokes, covering your entire face and neck. Don’t forget to bring the product down past your jawline to avoid that dreaded line of demarcation.
The slightly damp skin helps the moisturizer spread more easily and absorb faster. While your moisturizer settles in, you can multitask by brushing your teeth or choosing your outfit. Give it about 30 seconds to a minute to fully absorb before moving on to the next step. This prevents your makeup from sliding around or looking patchy.
If you have particularly oily skin, you might want to use a mattifying primer just in your T-zone, but for most people, a good moisturizer is all the prep you need for a natural makeup look.
Step 2: Even Out Your Skin Tone (2 Minutes)
Dispense a small amount of tinted moisturizer or BB cream onto the back of your hand. Using your fingers, dot the product onto your forehead, cheeks, nose, and chin. Then, quickly blend it outward using patting and sweeping motions. Your fingers are actually ideal tools for this because their warmth helps the product meld with your skin for a more natural finish.
Focus on blending thoroughly around your hairline, jawline, and the sides of your nose where foundation tends to look obvious if not properly blended. The goal here isn’t full coverage but rather to create an even, smooth canvas. Your natural skin should still show through slightly, giving you that fresh, skin-like appearance.
If you have any areas that need extra coverage, you can layer a bit more product there, but resist the urge to cake it on. Remember, we’re going for natural and effortless, not masked and perfect.
Step 3: Conceal and Brighten (2 Minutes)
This is where the magic happens. Concealer, when applied correctly, can make you look like you got eight hours of sleep even when you only got five. Apply concealer in an inverted triangle shape under your eyes, with the base of the triangle along your lower lash line and the point extending down toward your cheeks.
Gently blend the concealer using your ring finger or a damp makeup sponge, using light tapping motions. Never drag or rub the delicate under-eye area. The key is to blend the edges while leaving the center area opaque for maximum brightening effect.
Next, use the same concealer to spot-conceal any blemishes, redness, or discoloration. A little goes a long way here. Apply a tiny amount directly to the spot, then gently tap the edges to blend it into the surrounding skin. For best results, set your under-eye concealer with a light dusting of translucent powder, but if you’re really pressed for time, you can skip this step.
Step 4: Add Definition to Your Face (3 Minutes)
Now we’re going to wake up your face and add dimension. Start with your eyebrows, as they frame your entire face and make a huge impact on your overall appearance. Using short, light strokes, fill in any sparse areas of your brows, following their natural shape. Don’t try to create a completely different brow shape when you’re rushing. Just enhance what you have.
Brush through your brows with a spoolie to blend the product and soften any harsh lines. If you have unruly brows, a clear or tinted brow gel can keep them in place all day.
Next, apply your cream blush to the apples of your cheeks. Smile to find the right spot, then dab the product on and blend it upward toward your temples using your fingers or a stippling brush. Cream blush should look like it’s coming from within your skin, not sitting on top of it, so blend thoroughly but quickly. 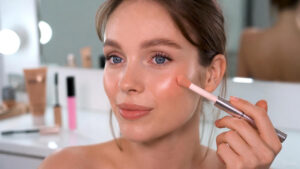
If you have an extra 30 seconds and want to add more dimension, sweep a bit of bronzer along your hairline, under your cheekbones, and along your jawline. This adds subtle definition and warmth to your face. However, if time is really tight, you can skip the bronzer entirely and still look polished.
Step 5: Eyes and Lips (2 Minutes)
We’re in the home stretch. Start by curling your lashes. This step takes just seconds but makes your eyes appear more open and awake. Hold the curler at the base of your lashes for about five seconds, then release.
Apply one or two coats of mascara to your upper lashes, wiggling the wand at the base and pulling through to the tips. This wiggling motion deposits more product at the roots, making your lashes appear thicker and fuller. If you have time, apply a light coat to your lower lashes as well, but use a lighter hand to avoid clumping or a heavy look.
Finally, apply your tinted lip balm or sheer lipstick. For the fastest application, apply directly from the tube to your lips, then press your lips together to distribute the color evenly. If you want slightly more precision, use your finger to pat the product onto your lips and blend it out toward the edges.
And there you have it. In just ten minutes, you’ve created a fresh, natural makeup look that enhances your features without looking overdone.
Time-Saving Tips and Tricks
Want to make this routine even faster? Here are some expert tips for shaving off precious seconds without sacrificing results.
Prepare your products the night before. Line up everything you’ll need in the order you’ll use it. This eliminates time wasted searching for products in the morning.
Keep your makeup in good lighting near where you get dressed. The more convenient your setup, the less time you’ll waste moving between locations.
Invest in multitasking products. A lip and cheek tint can replace both your blush and lipstick. A tinted moisturizer with SPF replaces three separate products. The fewer items you need to apply, the faster your routine becomes.
Practice this routine on a day when you’re not rushed. The more familiar you become with the steps, the faster and more efficient you’ll be when time is tight. Your hands will develop muscle memory, and you won’t have to think about what comes next.
Use your ring finger for blending whenever possible. It applies the least pressure, which is perfect for the delicate skin on your face, and you don’t have to wash brushes as often.
Common Mistakes to Avoid
Even with a simple routine, there are pitfalls that can cost you time or results. Avoid using too much product, which requires more blending time and can look cakey. Start with less than you think you need and build up if necessary.
Don’t skip the moisturizer to save time. Dry skin causes makeup to look patchy and settle into fine lines, actually making you look less polished. The minute you spend on moisturizer saves you trouble later.
Avoid using the wrong undertones in your products. If your concealer or tinted moisturizer doesn’t match your skin tone, no amount of blending will make it look natural. Take the time to find the right shades for your complexion.
Don’t apply too much mascara. Multiple coats take longer to dry and are more likely to clump or smudge. Two coats maximum is the sweet spot for a natural look.
Making It Your Own
This routine provides a solid foundation, but feel free to customize it based on your specific needs and preferences. If you have great skin, you might skip the tinted moisturizer altogether and just use concealer where needed. If you love a bold lip, swap the tinted balm for a more pigmented lipstick.
The beauty of this routine is its flexibility. Once you master the basic structure, you can adapt it to suit different occasions, seasons, or your evolving preferences. The goal is to create a reliable system that helps you look and feel your best, even on the most hectic mornings.
Final Thoughts
Mastering a quick, natural makeup routine is one of the best gifts you can give yourself. It removes the stress of getting ready, ensures you always look polished, and gives you those extra few minutes of sleep we all crave.
Remember, the key to speed is preparation and practice. The first few times you try this routine, it might take you twelve or thirteen minutes. That’s perfectly normal. As you become more familiar with the steps and products, you’ll naturally get faster and more efficient.
Most importantly, this routine should make your mornings easier, not add more stress. If you find yourself rushing and feeling anxious, set your alarm five minutes earlier until the routine becomes second nature. Those five minutes are a small price to pay for starting your day feeling confident and put-together.
Now you have everything you need to create a beautiful, natural makeup look in just ten minutes. Save this guide, practice the techniques, and enjoy the freedom of quick, effortless mornings. Your future self will thank you every time that alarm goes off.

Best Way to Grow Hair Fast

Best Way to Sleep